
TABLE OF CONTENTS
Summary
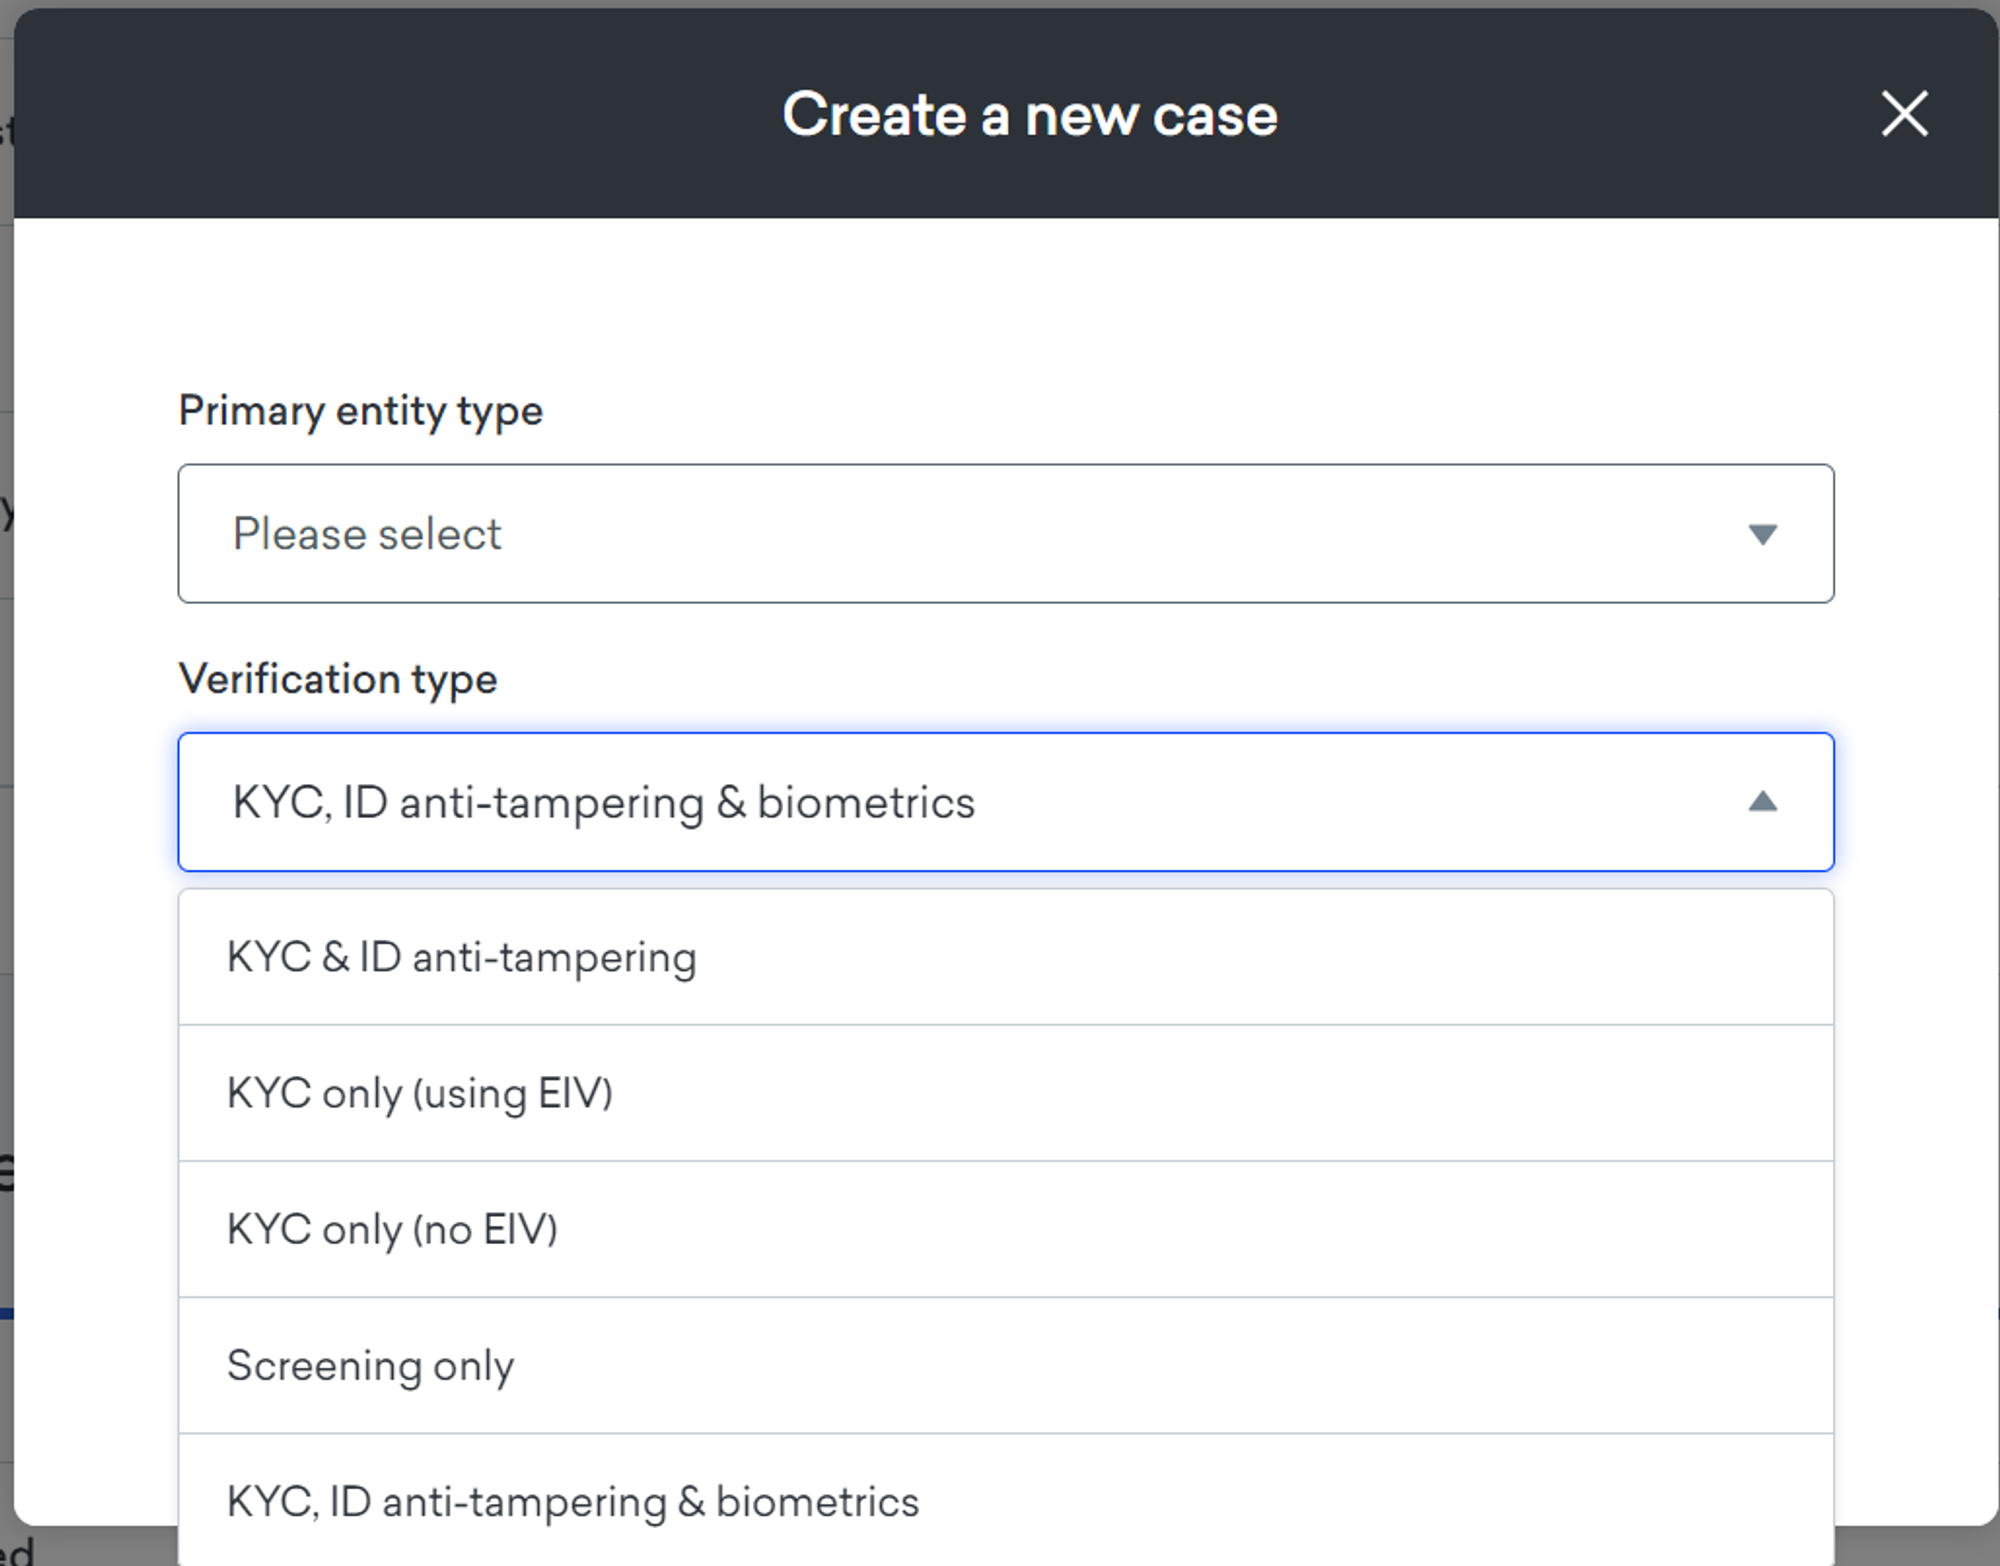
Verification types determine how First AML checks each individual in your cases — for example, a full KYC and ID check, screening only, or a biometric check. The verification types available to you are configured by First AML to match your compliance requirements, so you may have some or all of them enabled.
Once your verification types are set up, you can choose which one applies at both a case level and an individual level, and change it whenever you need to.
To understand what each verification type covers in detail, see Understanding verification types.
What are verification types?
A verification type sets how First AML verifies each individual. Depending on what's enabled for you, these can include:
- KYC & ID anti-tampering — sends the individual an electronic identity verification (EIV) form requesting their name, date of birth, address, and ID details.
- KYC only (using EIV) — sends an EIV form requesting name, date of birth, and address.
- KYC only (no EIV) — you enter the individual's name, date of birth, and address directly, with no contact to the individual.
- Screening only — runs PEP, sanctions, and adverse media checks.
- KYC, ID anti-tampering & biometrics — sends an EIV form requesting name, date of birth, address, ID details, and a biometric video.
Only the verification types configured for you appear in the dropdown. Biometric checks are on by default and can be skipped by the individual completing the form — check the verification report to confirm the biometric step was completed.
How to request verification types
Your verification settings are configured by First AML rather than something you set up yourself, so to add a new verification type — or change which types are available to you — contact your First AML team at customersuccess@firstaml.com or support@firstaml.com. Once they've configured them for you, they'll appear as options when you create a case or add an individual.
Selecting a verification type when you create a case:
1. Select "Create new case"
2. Select the primary entity type
3. Select your verification type from the dropdown
4. Enter the case name and submit your case
Every individual you add to the case will use this verification type by default. You can choose a different type for an individual as you add them.
Please note that only the options you configure will be visible in the dropdown. All individuals created and added within the case will automatically populate with the verification level you select at case creation. If needed, you can adjust the verification setting when creating an individual within the case.
Selecting a verification type when you add an individual
When you add an individual, the case's verification type applies by default.
To use a different one, choose it from the **Verification type dropdown as you add them. The required fields change with the type: EIV-based types need only the individual's name and contact details, while non-EIV types (*Screening only* or *KYC only (no EIV)*) ask you to enter their name, date of birth and other details directly.
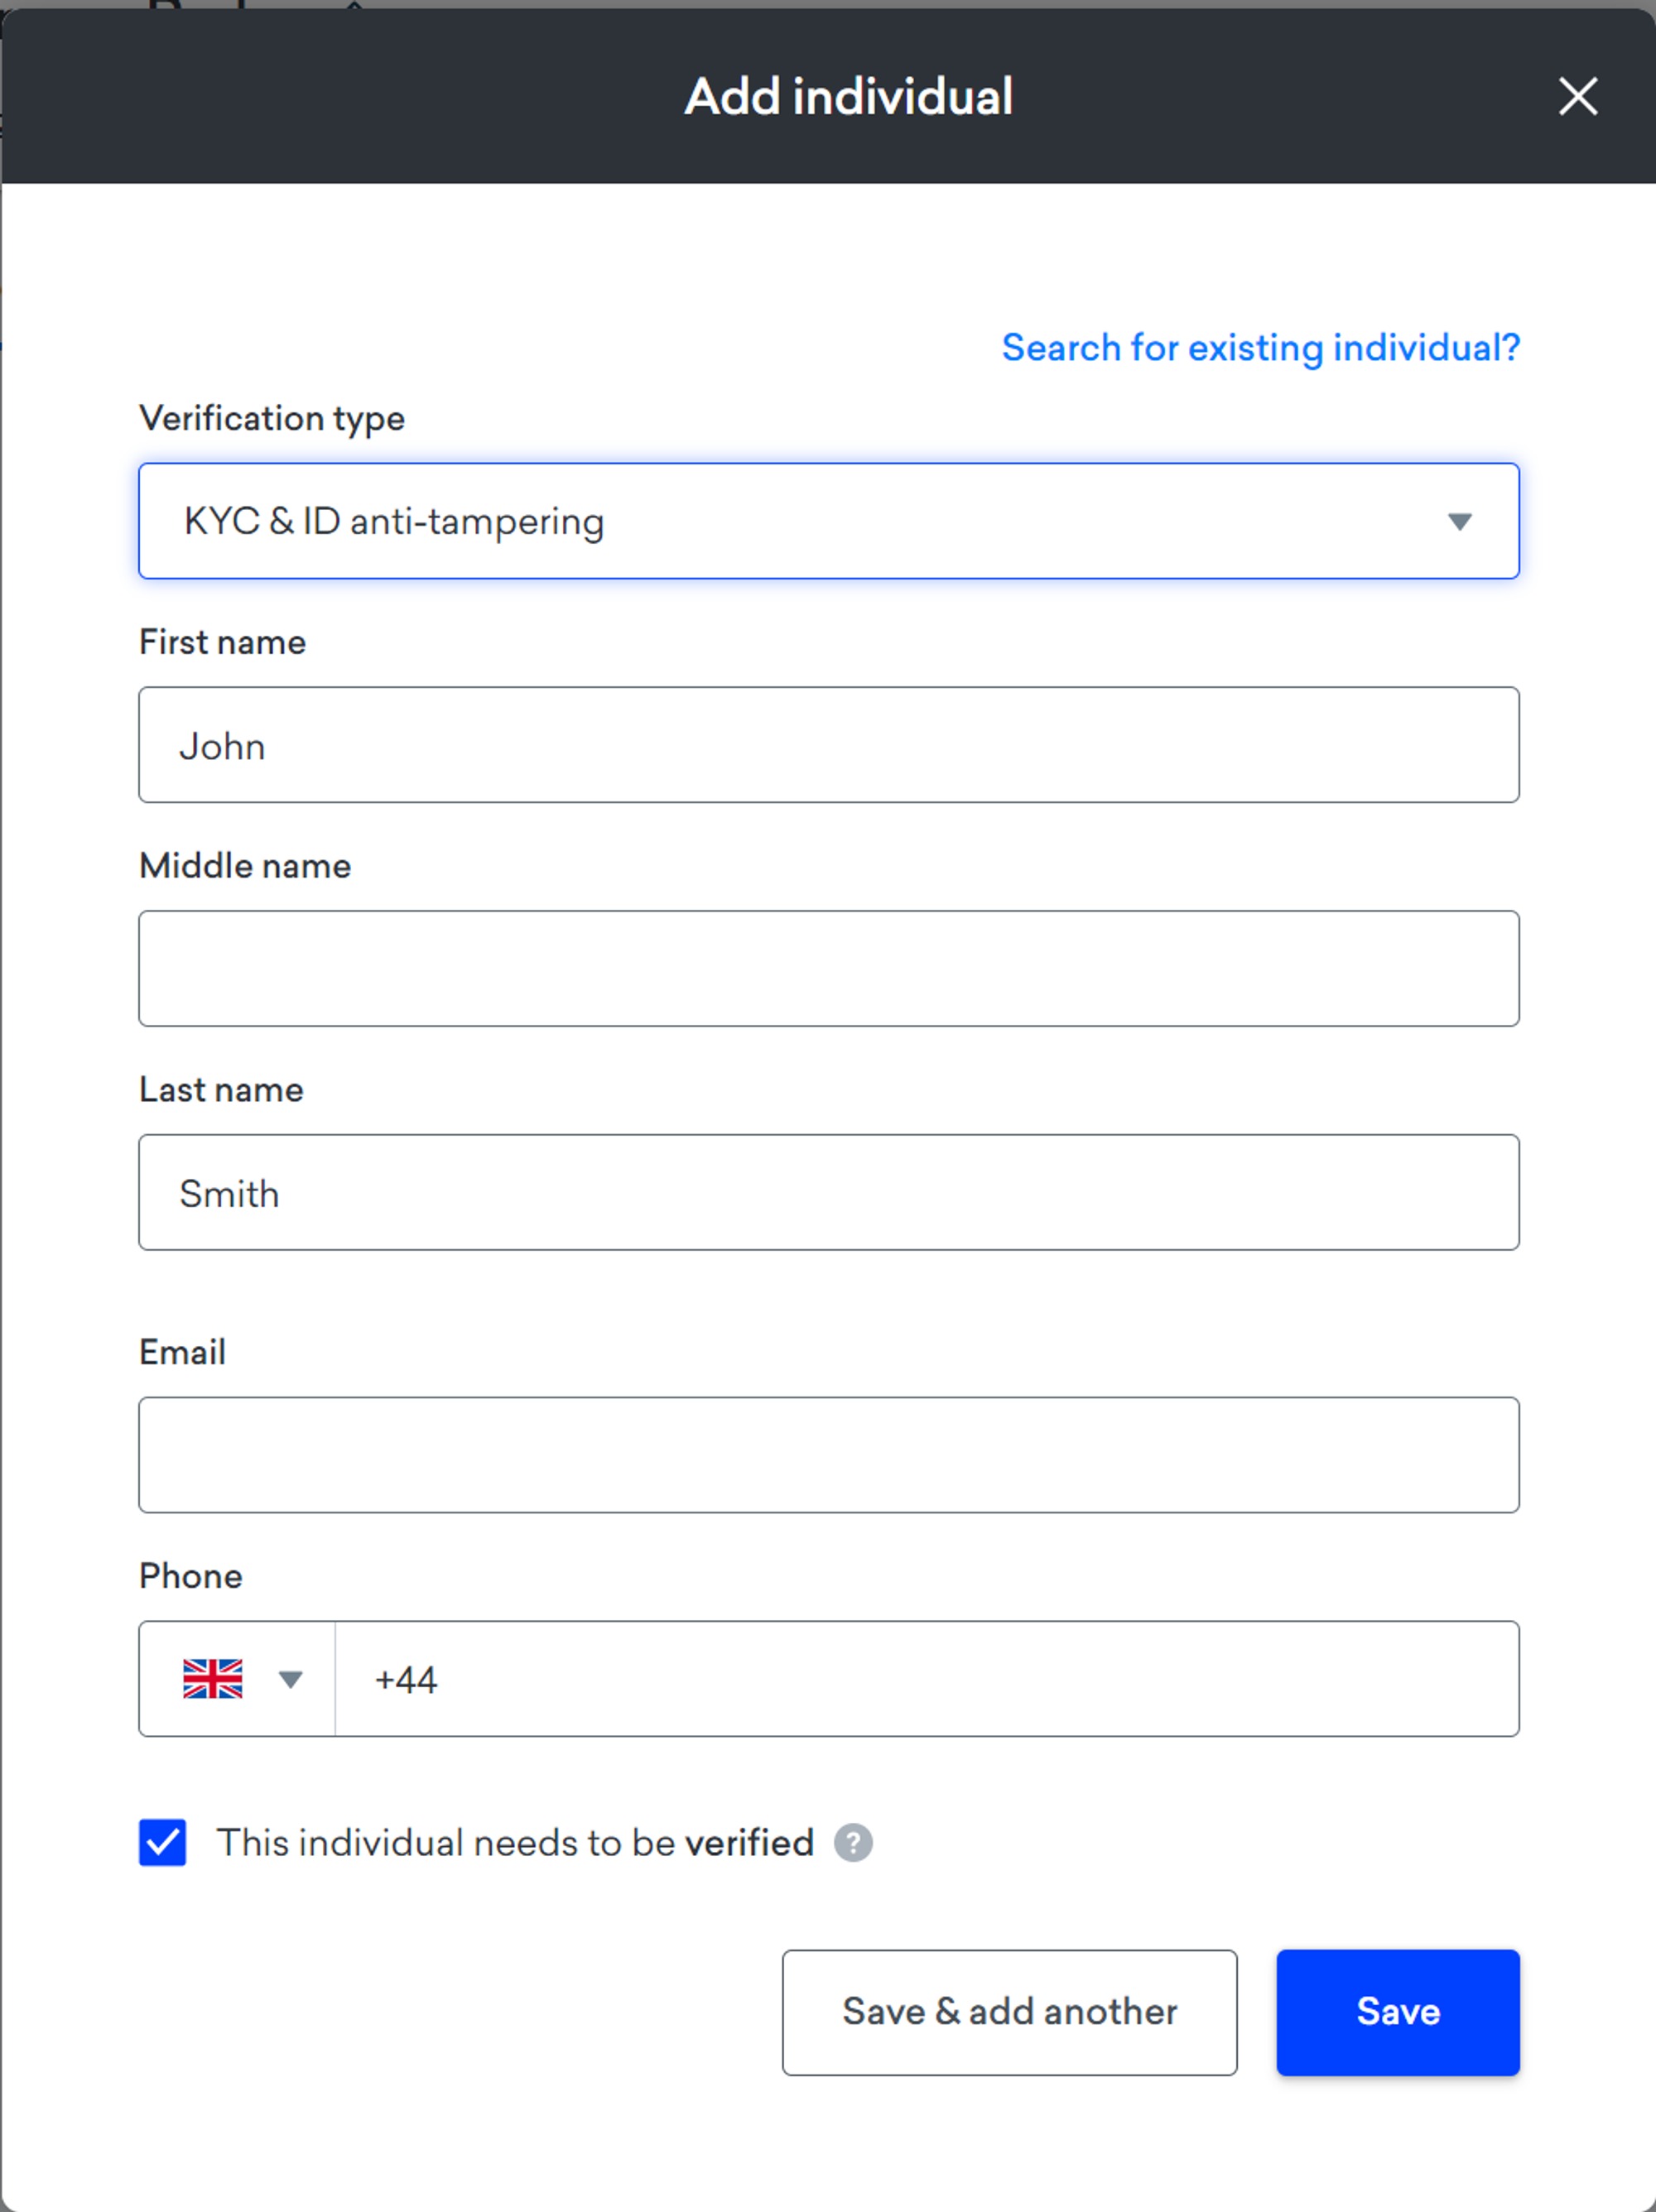
The required fields shown will update depending on which verification type you select. Options that involve sending an electronic identity verification form (EIV) only need the individual's name and contact details; options without an EIV form (e.g. KYC only, no EIV or Screening only) ask you to enter their name, date of birth, and other details as mandatory fields.
How do you upgrade or downgrade a verification type?
You can upgrade or downgrade a verification type for an individual easily.
- Navigate to the Manifest and click Verification details.
- Click the dropdown under Verification typeand select whichever new verification type you want to change to.
- Please note, depending on the newly selected verification type, there may be new mandatory fields.
- Upgrade example: you are upgrading an individual from "Screening Only" to "KYC + ID anti-tampering." This will prompt you to provide the email address or phone number of the individual, to send an EIV form.
- Downgrade example: you are downgrading from "KYC + ID anti-tampering + biometrics" to "KYC Only." This will prompt you to provide the individual's name, date of birth, and address information, to run a KYC-only check.
- Click Save to save the new verification type.