
TABLE OF CONTENTS
- How to Configure Forms
- Step 1: Plan your Form
- Step 2: Create a New Form
- Step 3: Form Builder: Add a Display name
- Step 4 (Optional): Enable scores and thresholds
- Step 5: Add Sections and Questions
- Step 6: Save & Publish
- Features to make form building easier
Summary
Under AML legislation, taking a risk-based approach is a core requirement for compliance.
How to Configure Forms
You can configure and publish forms for use in your compliance workflows. These forms can include branching logic, version history, and scoring (if applicable).
This guide walks you through how to plan, build, and publish your forms using the Form Builder.
Need help with your forms? Submit a ticket or email us on support@firstaml.com
Step 1: Plan your Form
Before building your form, map out the structure and purpose. Consider:
Which question types suit each section? (Yes/No, Select, Free Text, etc.)
Should any questions branch based on earlier responses?
Will the form include scoring logic? (Not supported for Custom Forms)
What thresholds define Low, Medium, and High risk? (for Client/Case forms
Step 2: Create a New Form
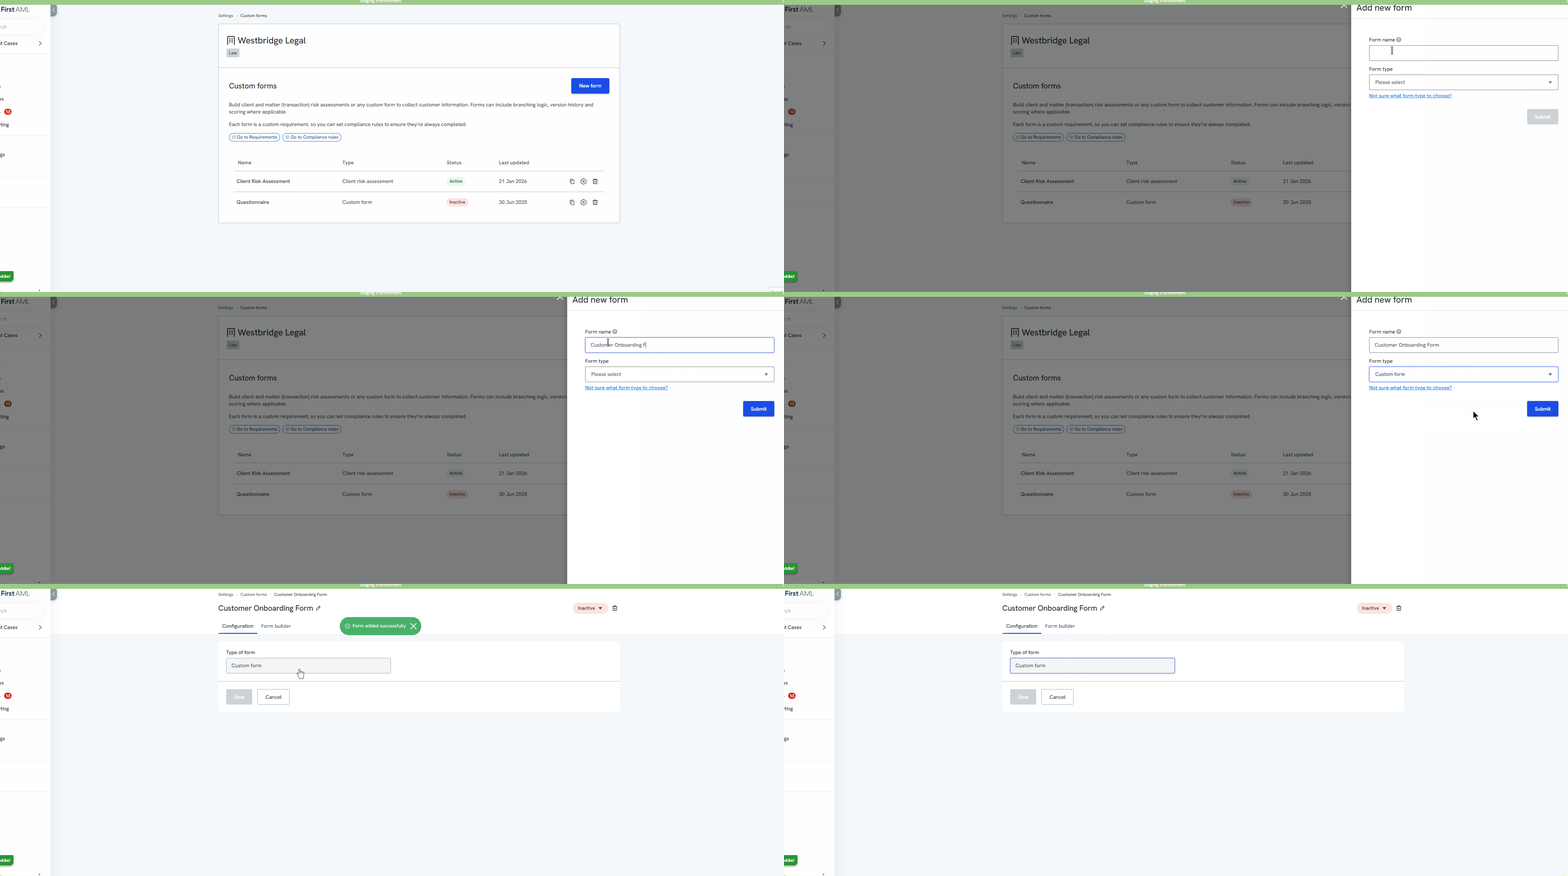
- Go to Settings in the left-hand navigation.
- Click Forms.
- Click New Form (or select an existing form to edit).
- Give your form a name. Note this name is for internal view only, the form name will not be visible to clients.
Step 3: Form Builder: Add a Display name
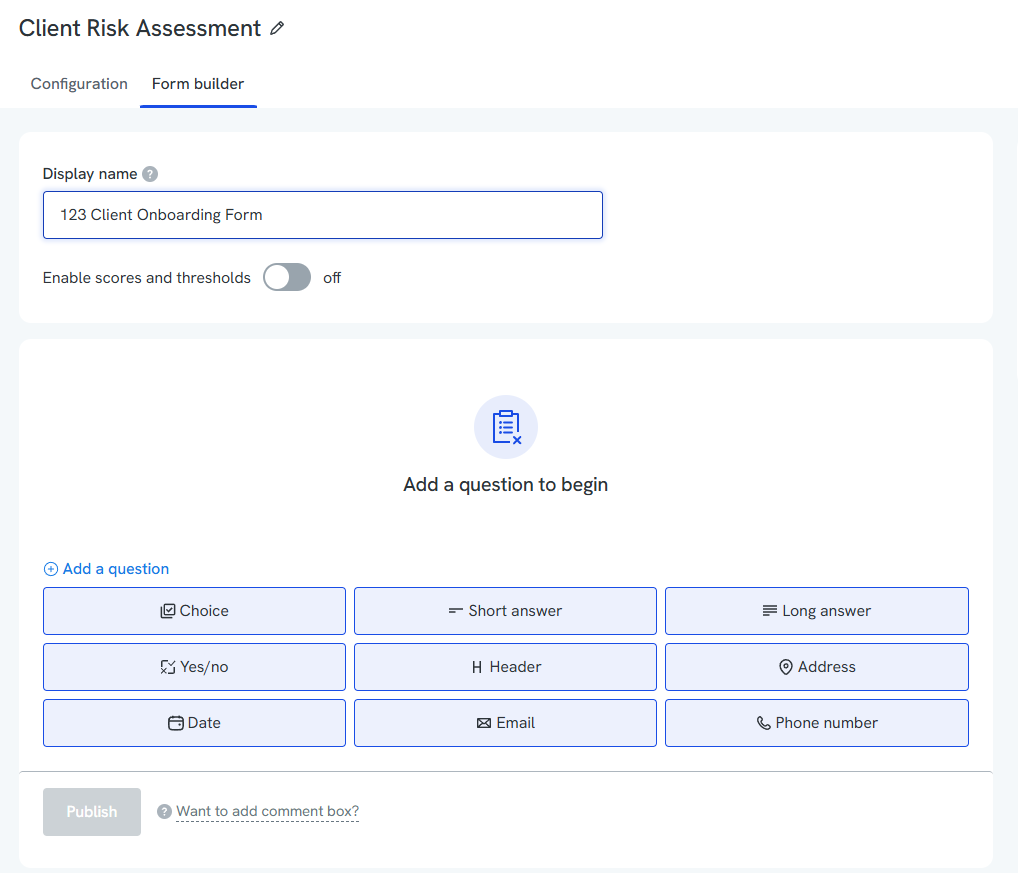
In the Form Builder, add a Display name which will be visible to clients if you are sending the form externally. This is also what the Requirement will be called and what platform users will see within the case.
1. Click the Display name box
2. Enter the display name - This will automatically save once you click away
Step 4 (Optional): Enable scores and thresholds
Risk weighting allows you to automatically calculate the overall risk score of a client or case. This feature is not available in Custom Forms.
The form builder enables you to add "weighting" to each answer, with lower scores for answers that represent lower risk, and higher scores for red flags. For example, answering “Yes” to “Will we meet the client in person?” might have a score of 0 (low risk), while “No” might have a score of 3 (higher risk).
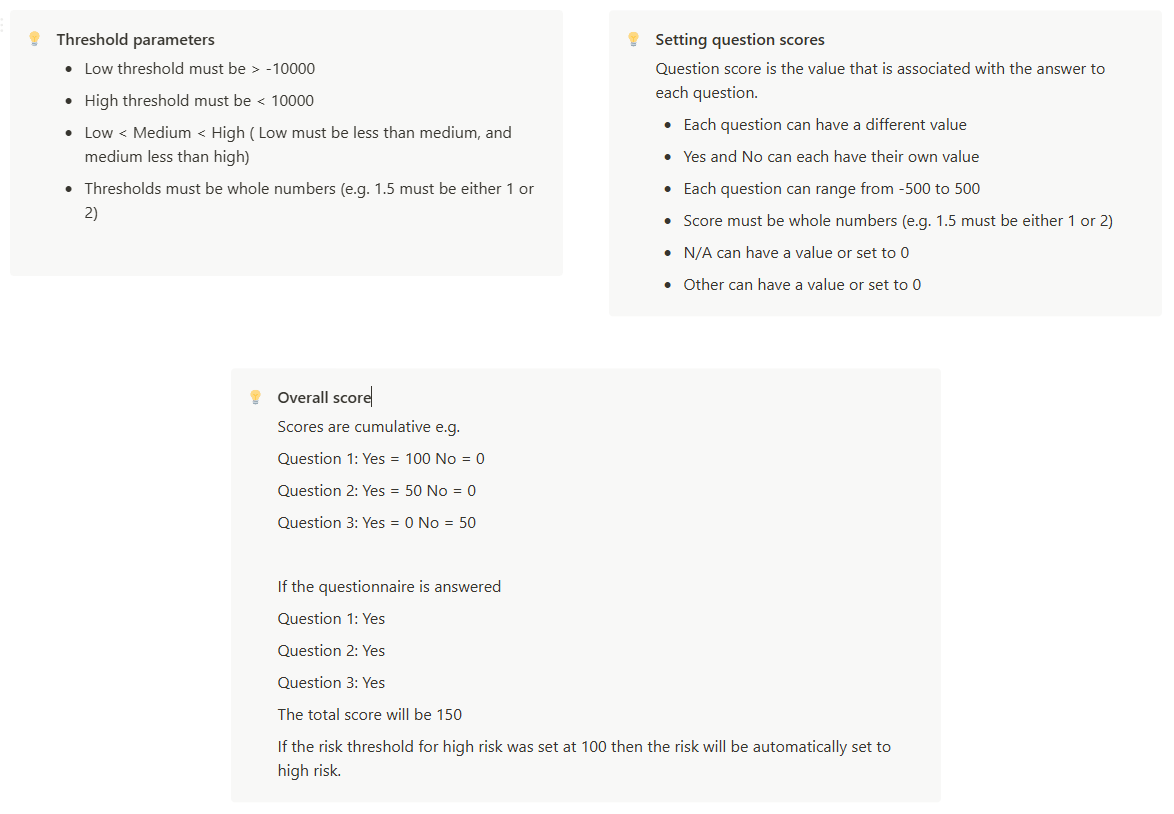
When a risk assessment is completed, the cumulative score of all answers is presented and the client/case is categorised as either Low, Medium, or High risk depending on where the score falls within the score parameters set by you.
For example if you set the High Risk threshold as 10, an overall score of 11 will categorise the client/case as High Risk.
The score of a Case Risk Assessment feeds into the risk scoring of the case it is completed in. The score of a Client Risk Assessment is displayed in the relevant client's Profile.
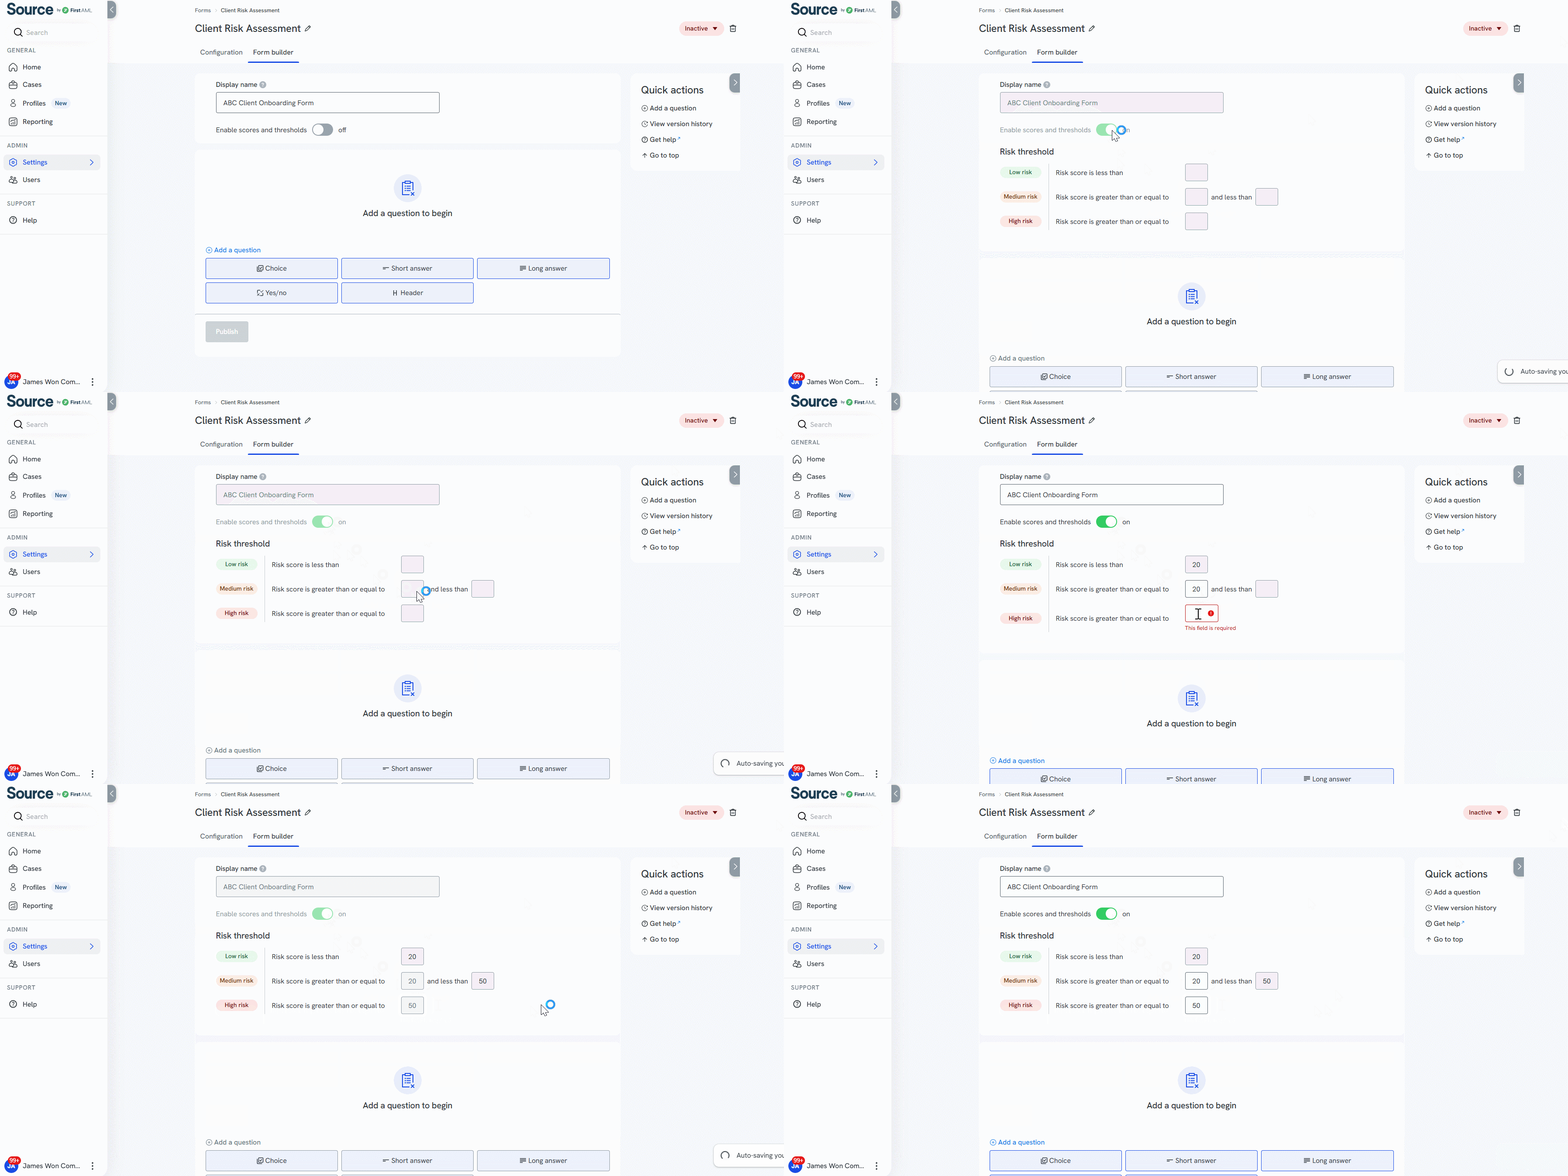
To automatically calculate risk levels:
- Click the Enable scores and thresholds toggle
- Enter your Medium and High risk thresholds:
- Total score below low threshold = Low Risk
- Total score between low and high = Medium Risk
- Total score above high threshold = High Risk
Step 5: Add Sections and Questions
In the Form Builder, you’ll build your form section-by-section using the toolbox.
How to add a question:
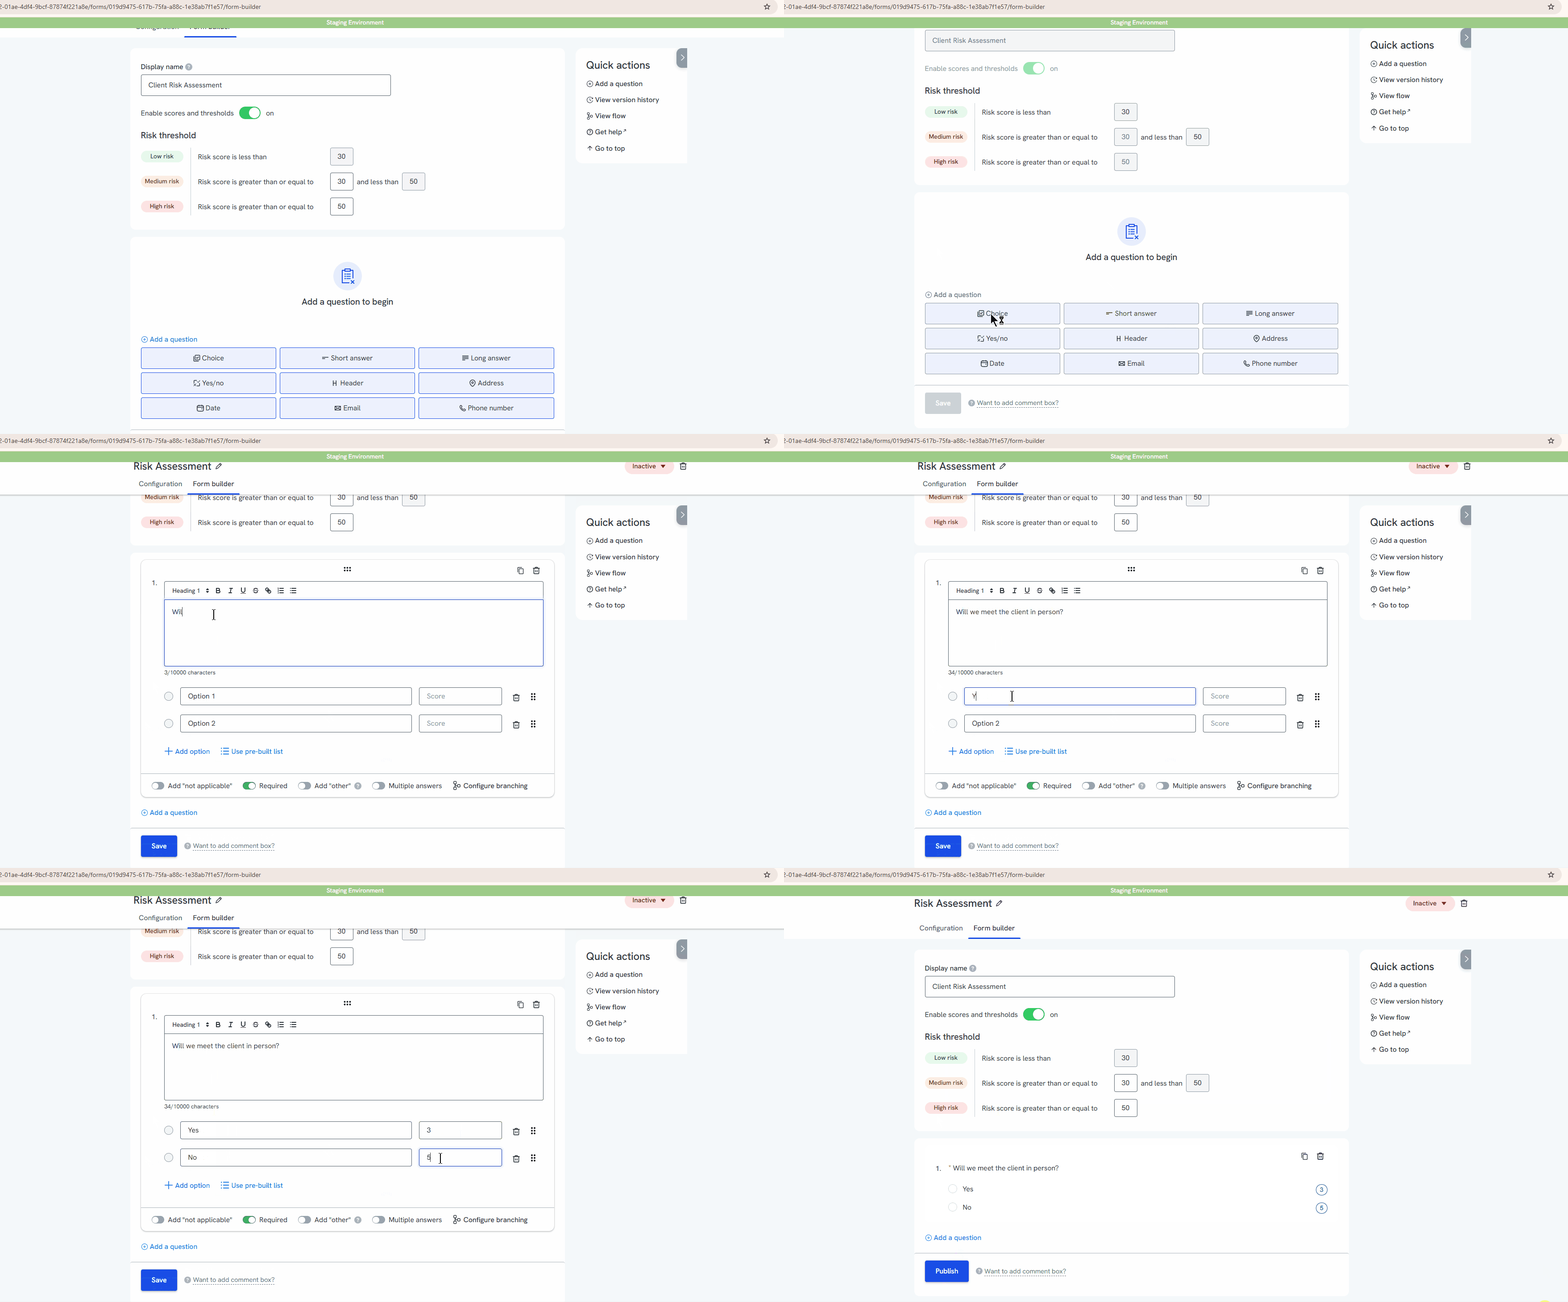
Click Add a question
Choose your question type:
Choice – Select one or more options (scoring supported).
Short answer – Free text (non-scoring).
Long answer – Free text with more space to guide the user to provide a longer answer (non-scoring).
Yes/No – Simple yes/no (scoring supported).
Header – Use this to visually group related questions into sections.
Date Picker - Use this to organize by dates or include important dates
Email Confirmation - Confirm main contacts email
Phone Number - Confirm main contact's phone number
Address - Confirm either contacts address or property address involved
Enter your question text. You can format the text using tools for bold, underline, strikethrough, and hyperlinks.
Customise your question:
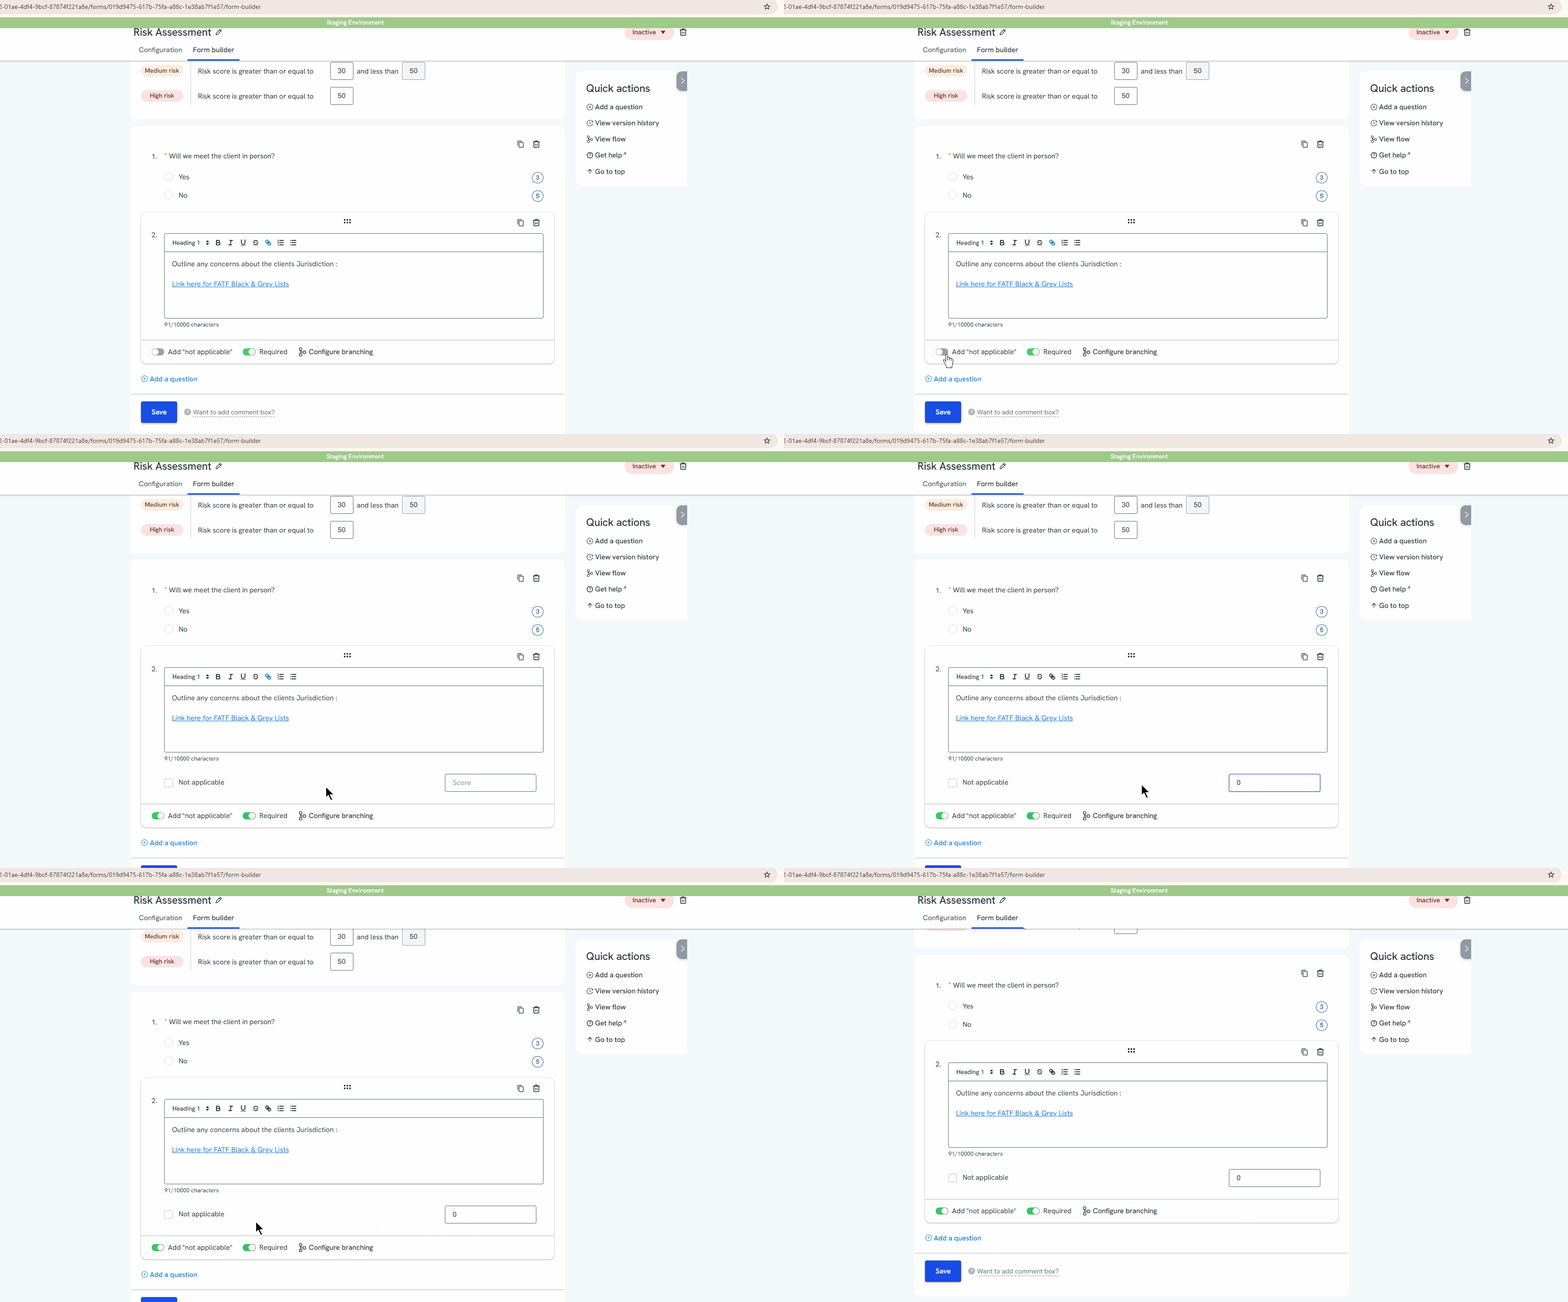
Most question types (excluding Header) support the following options:
Not applicable: Enable this if the question might not apply in all cases. You can also assign a score to this response.
Required: Force users to answer the question before submission.
Customise your Choice questions:
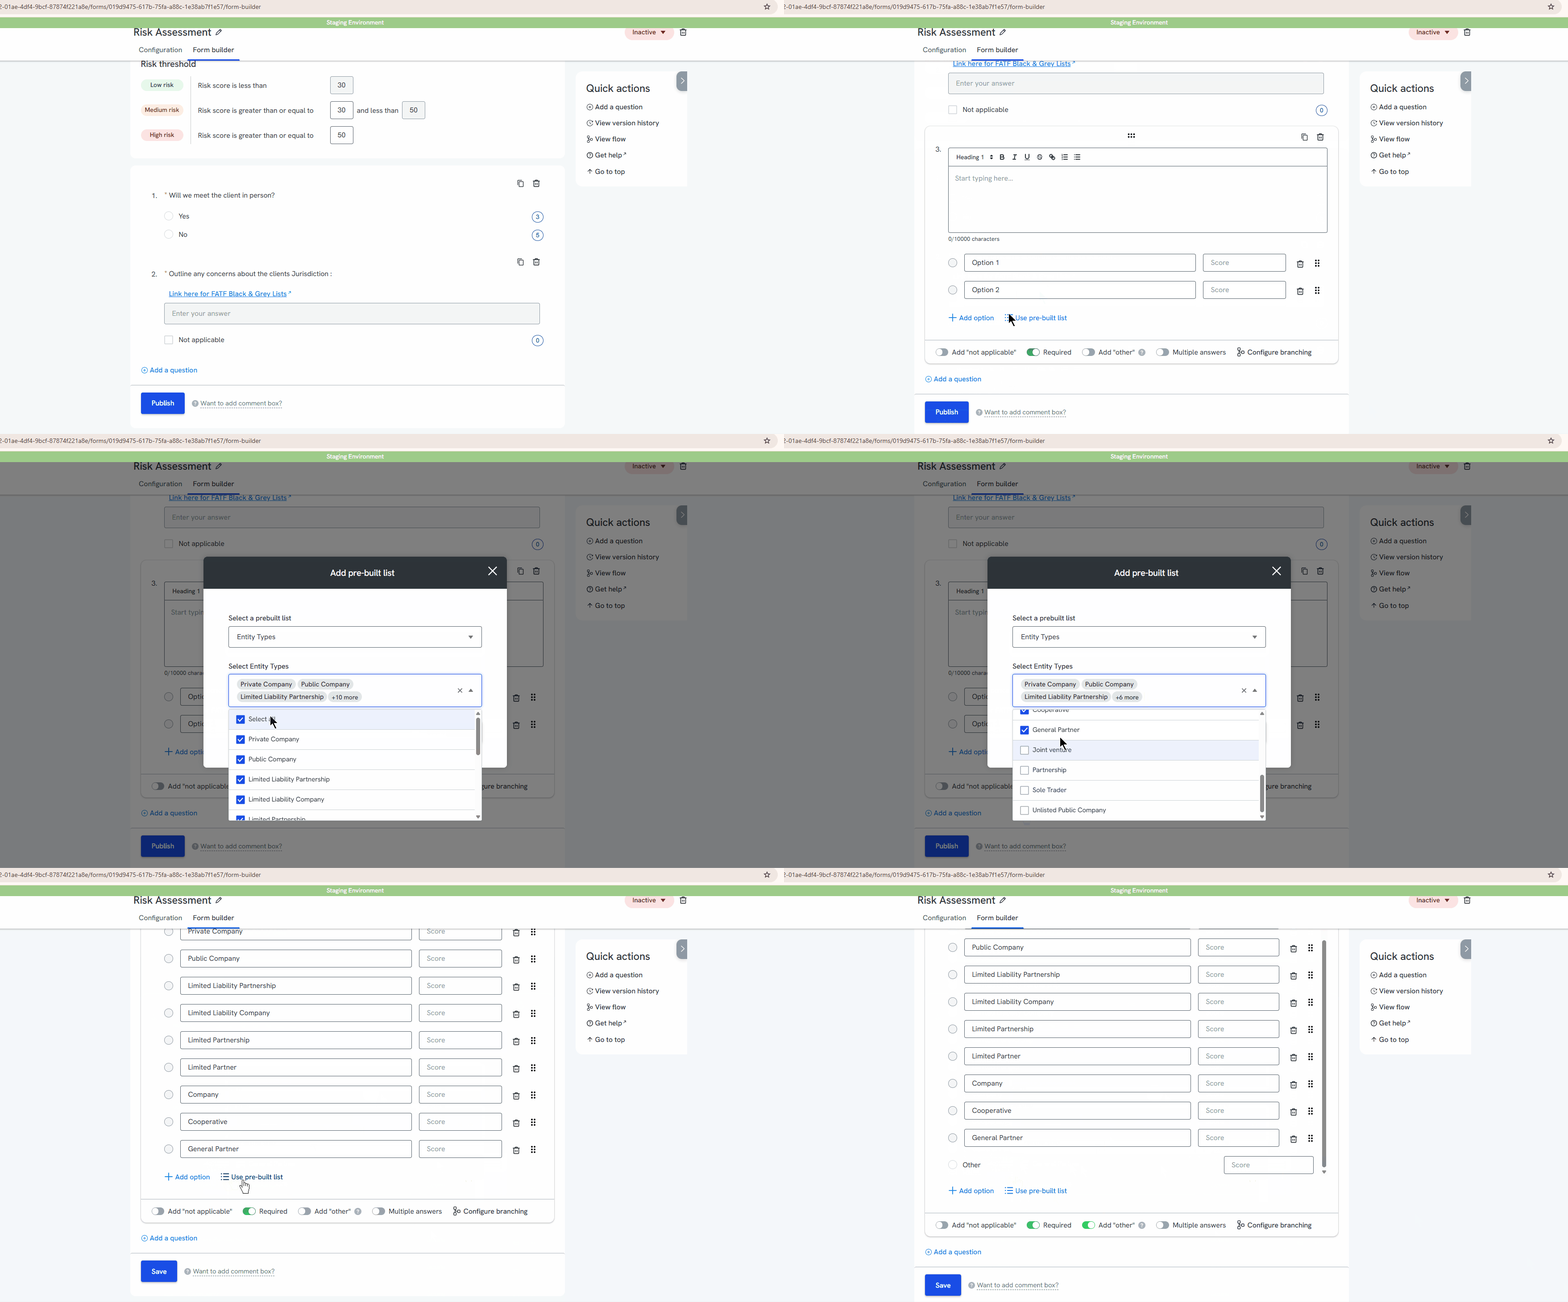
Choice questions offer the most flexibility and support several options:
Add answer options manually, or use a pre-built list (e.g. Country or Entity Type) to save time.
Enable Other to allow a free-text response. You can optionally assign a score to “Other.”
Enable Multiple answers to let users select more than one option.
Note: If “Multiple answers” is enabled, branching is disabled for this question.Assign scores to each answer based on risk.
Tip: Use lower scores for low-risk responses and higher scores for high-risk or red flag answers.Enable Branching* to show different follow-up questions based on user responses.
Tip: We recommend building all your questions first, then adding branching logic once the structure is in place .(Learn more about Branching)
Step 6: Save & Publish
When you're ready:
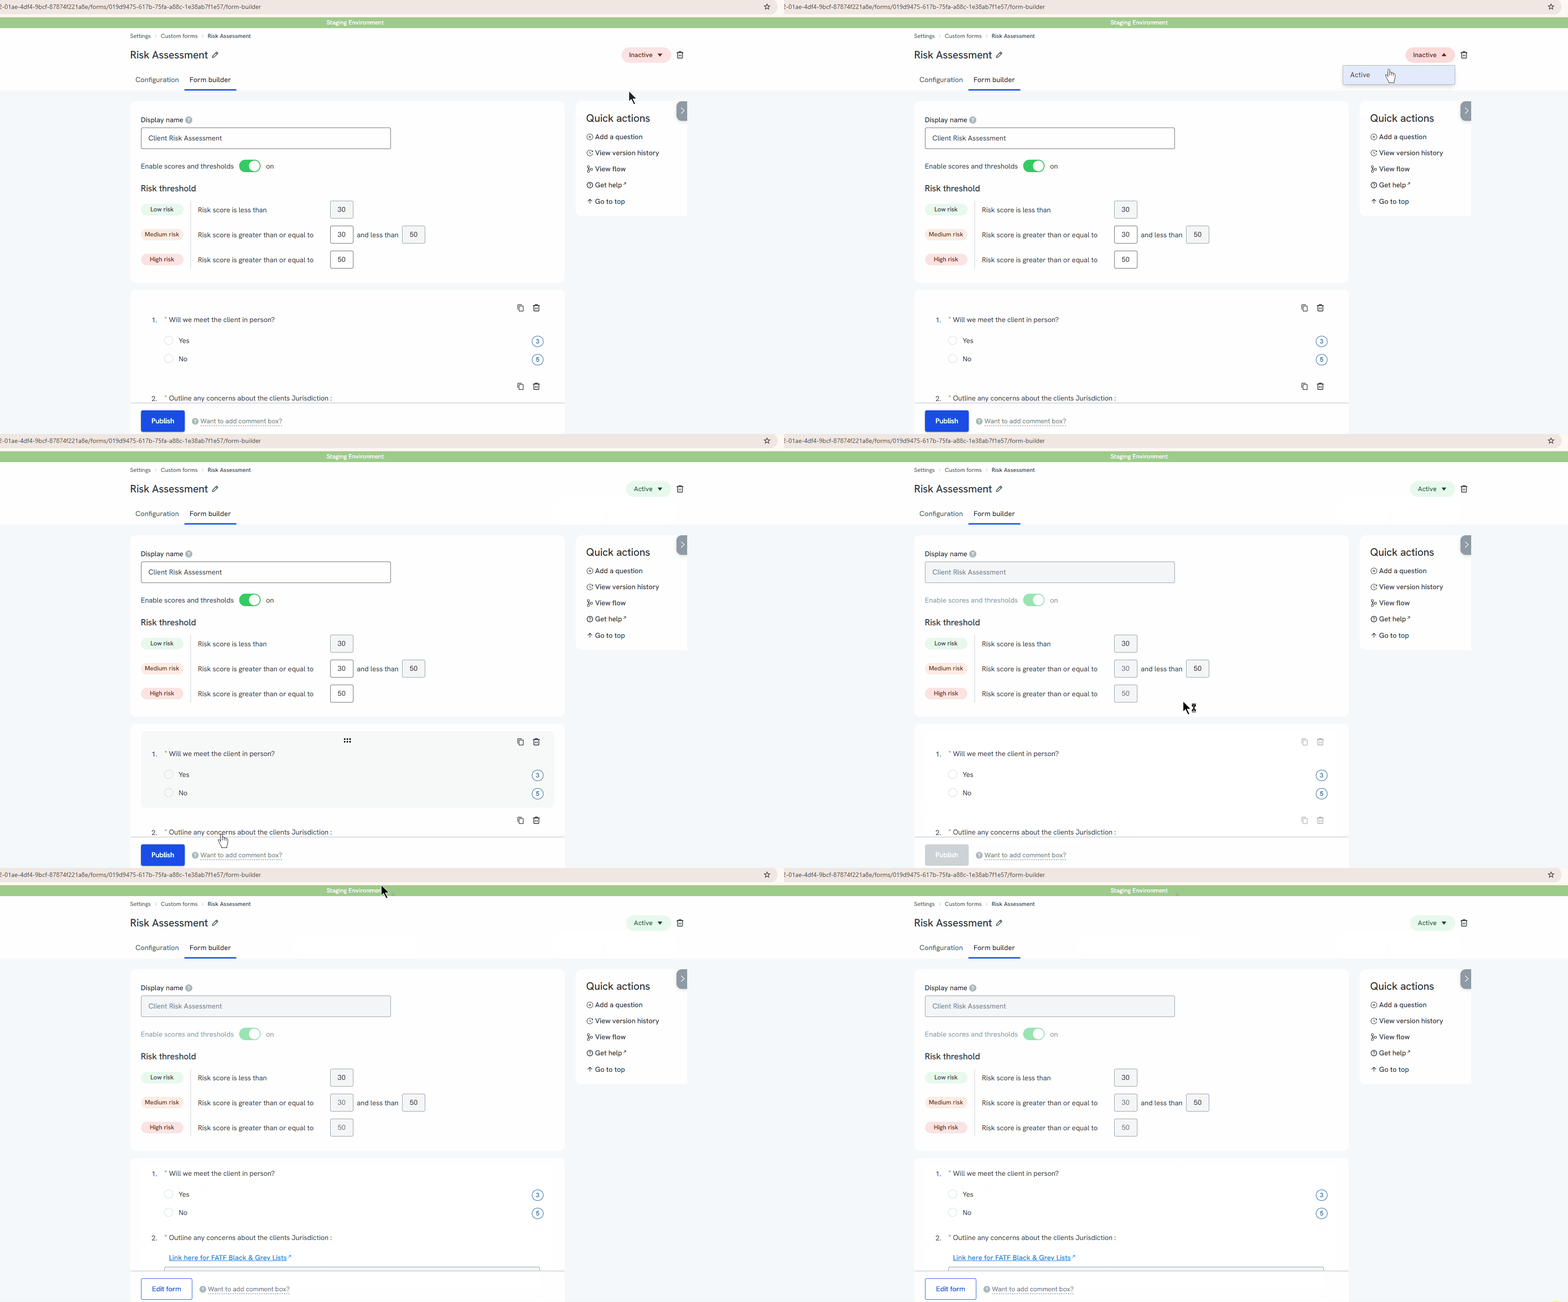
- Click Save to save your progress
- Click Publish to save the version
The risk assessment form will now be attached to all new cases associated with the office/s it is assigned to, along with any in progress cases where the risk assessment has not been edited.
For information about using Risk Assessment within a case.
Features to make form building easier
View Flow
The View Flow displays an interactive map of all the questions you’ve configured in your form.
This helps you visualise how your form progresses, especially when using dynamic questions, to ensure each path flows correctly and reconnects to the main questions for all clients.
To open the map, click View Flow and the logic map will slide in from the right-hand side of the screen.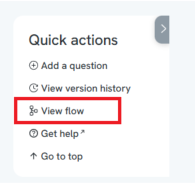
You can adjust the view using the size selector in the top right corner. Choose from S, M, or L depending on your preferred level of detail.
The toolbar in the top left corner of the map allows you to:
Zoom in or Zoom out
Fit view to see the entire form
Lock form to prevent dragging questions on the map
Exit mini map
Download flow chart for reference or sharing
When the lock icon is in the unlocked position, you can drag and move the question boxes around the mini map.
This helps you rearrange the view to see all questions clearly or adjust the layout for easier navigation.
Duplicate question
Copy and reuse an existing question in seconds. This is ideal for quickly building similar sets of questions.
➤ Click the Duplicate icon within the applicable question. Then edit and/or reorder the duplicated version as needed.
Reorder questions and answer options
Sort questions and answer choices for better clarity and logic. You might order answers alphabetically, by risk level, or group them in a way that makes sense.
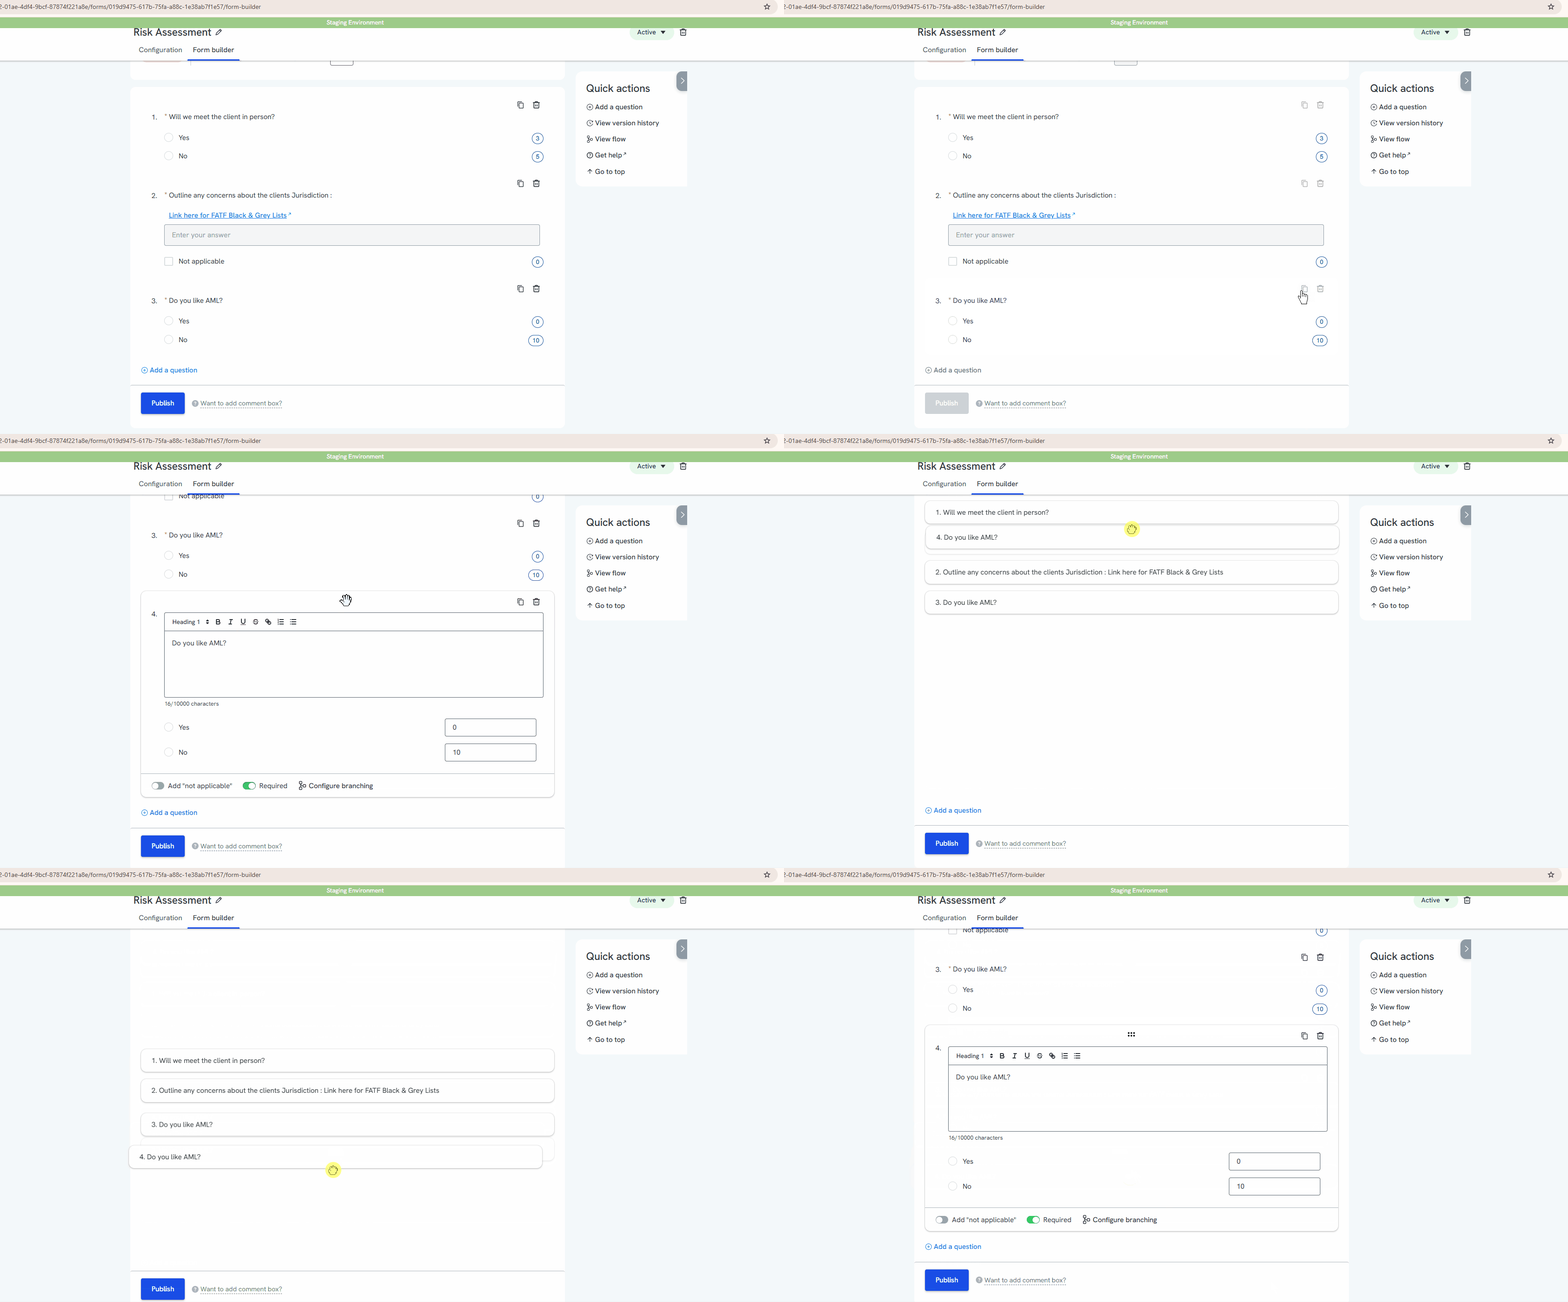
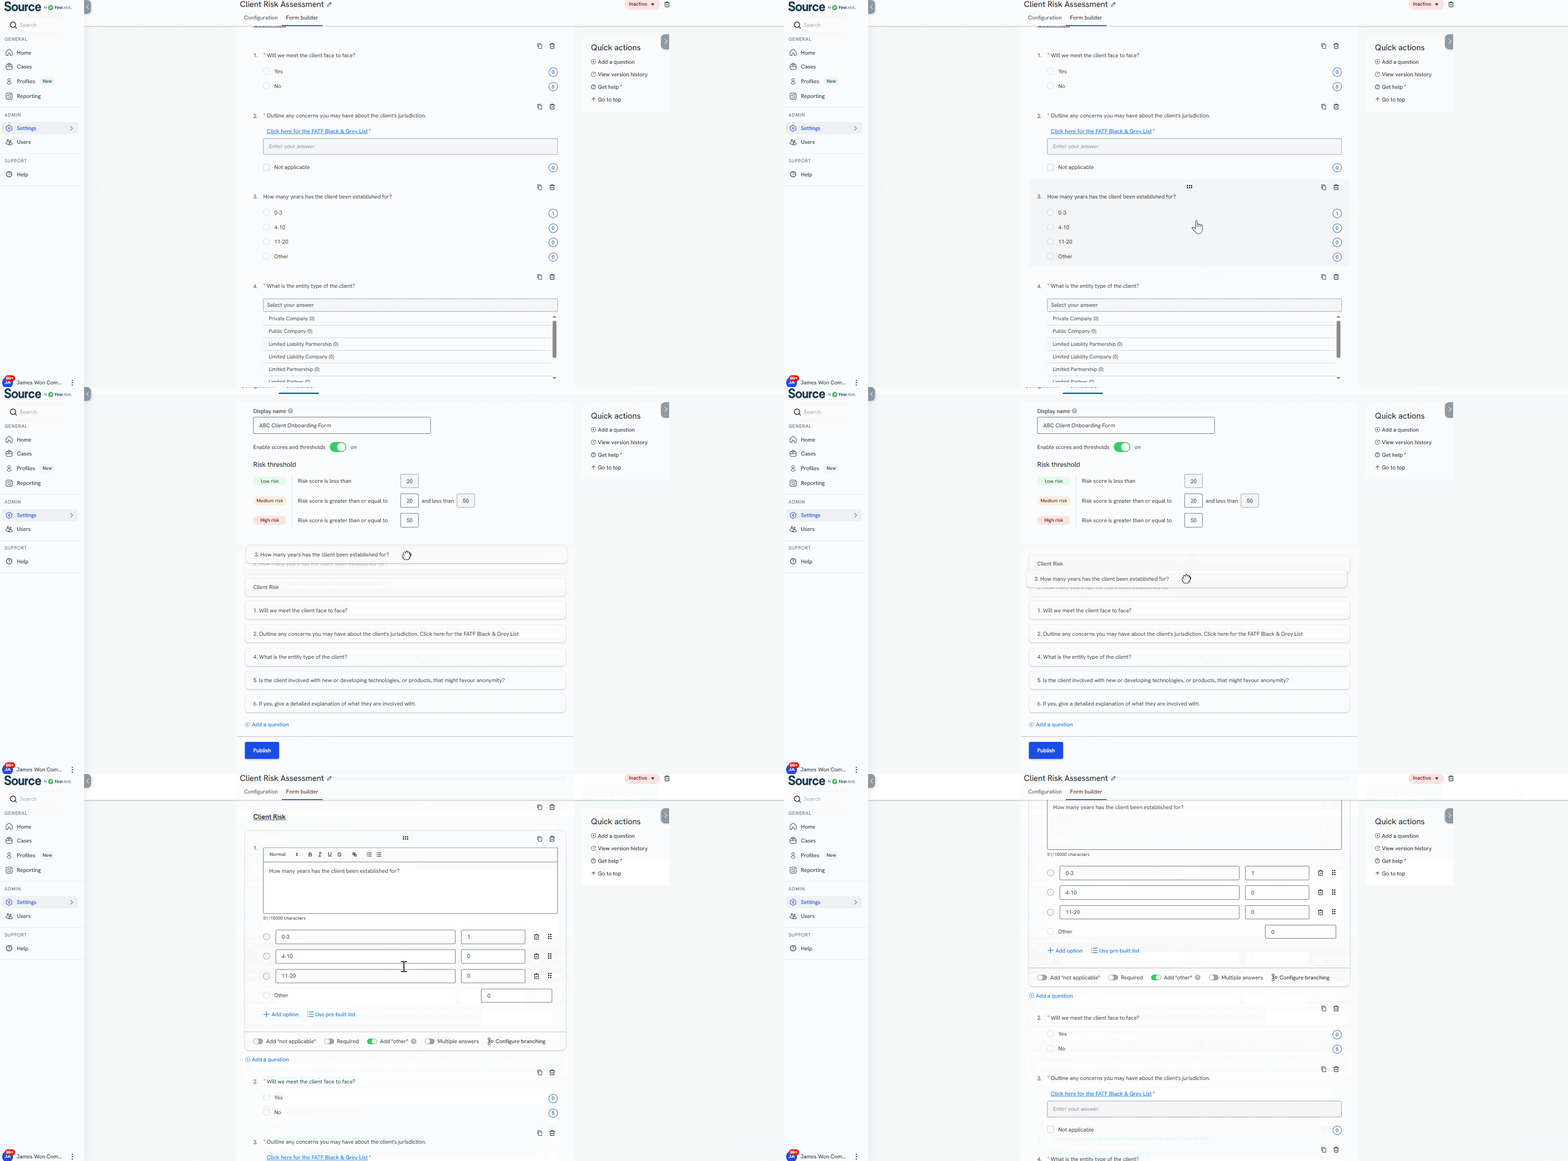
➤ To move a question, hover over it and click the six-dot icon, then drag and drop it to the desired position.
➤ To reorder answer options, open a select-type question and drag the six dots next to each answer to rearrange them.
Pre-built lists
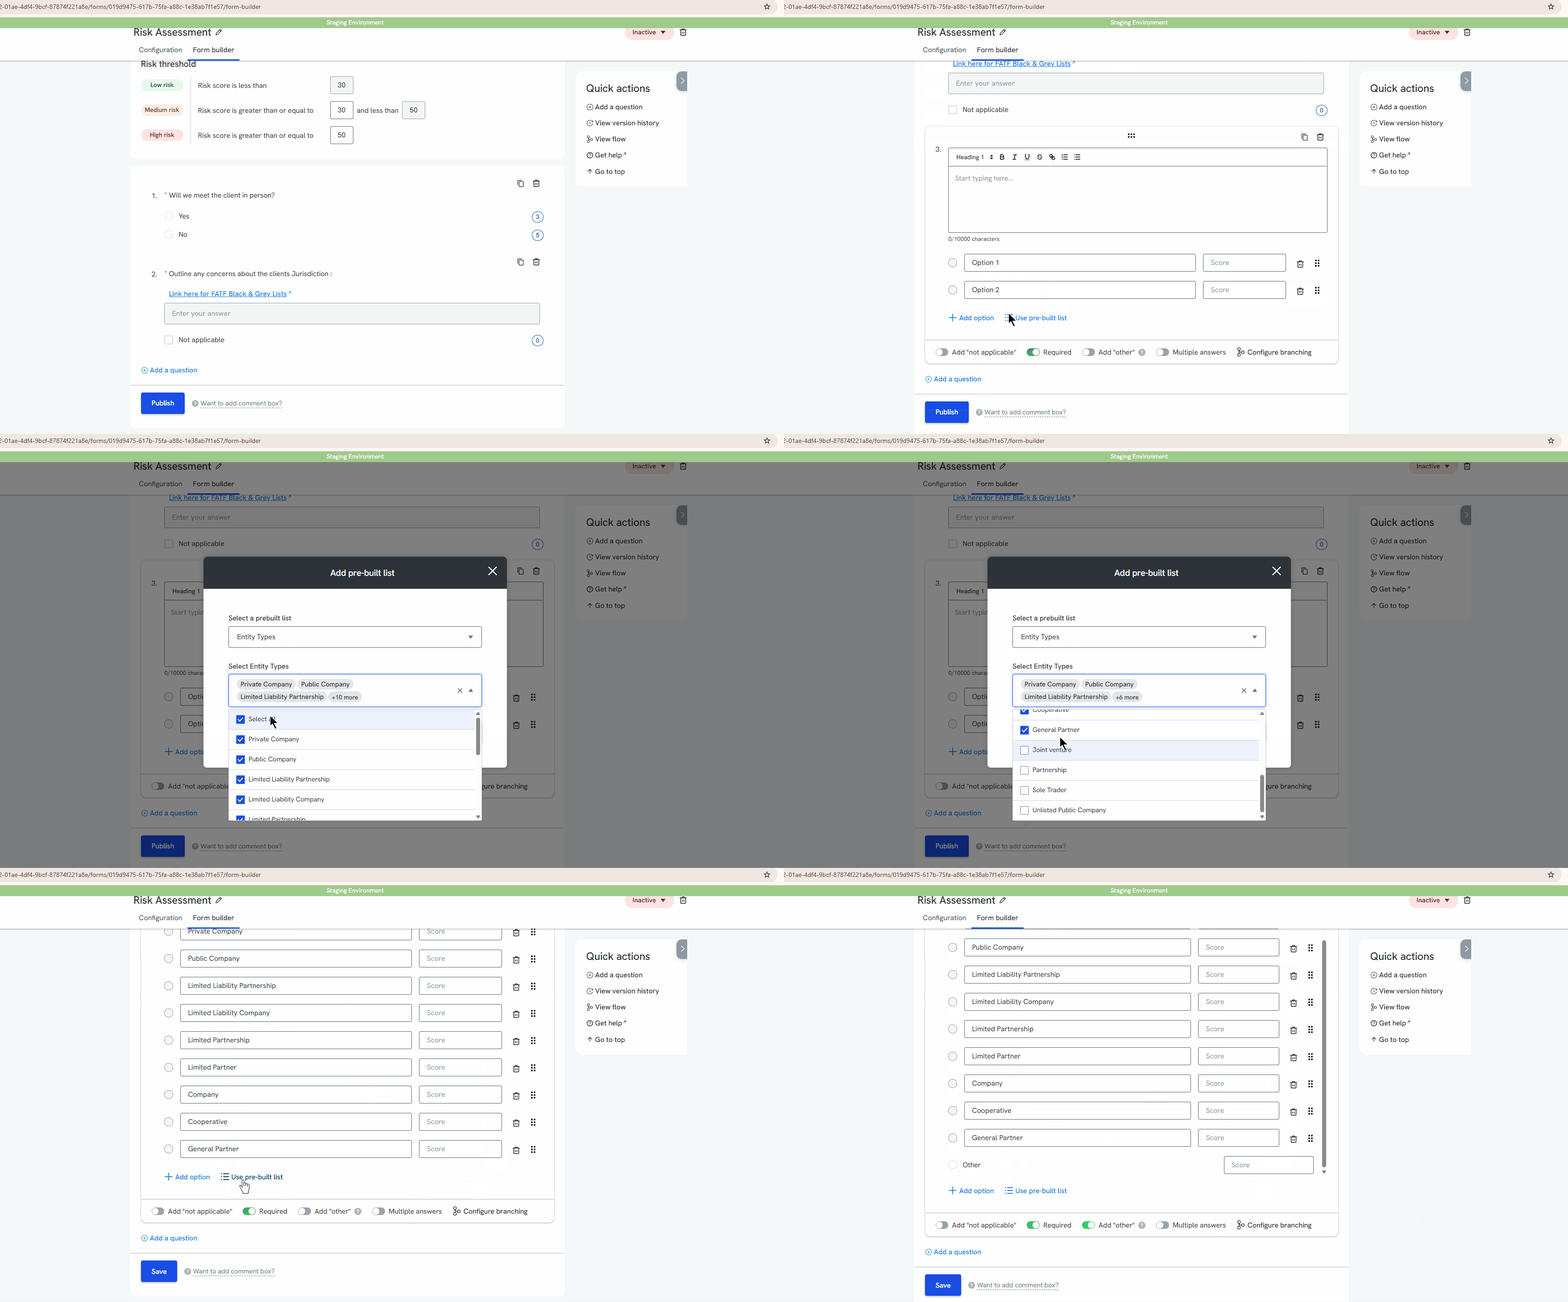
Use standardised lists for common fields Country and Entity type. This reduces manual entry and ensures consistent formatting.
➤ When adding answer options to a choice question, click Use pre-built list and choose from Country or Entity Type.
➤ Select all or customise which of the options from the dropdown you want to add, then click Add
➤ Add risk weighting to each answer
Note: More pre-built lists will be added in future.
Save draft during build
You don’t have to complete your form in one go. This helps avoid clutter in version history and gives you freedom to edit incrementally.
➤ As you build your form, changes are automatically saved as a draft.
➤ Your draft won't go live until you click Publish.
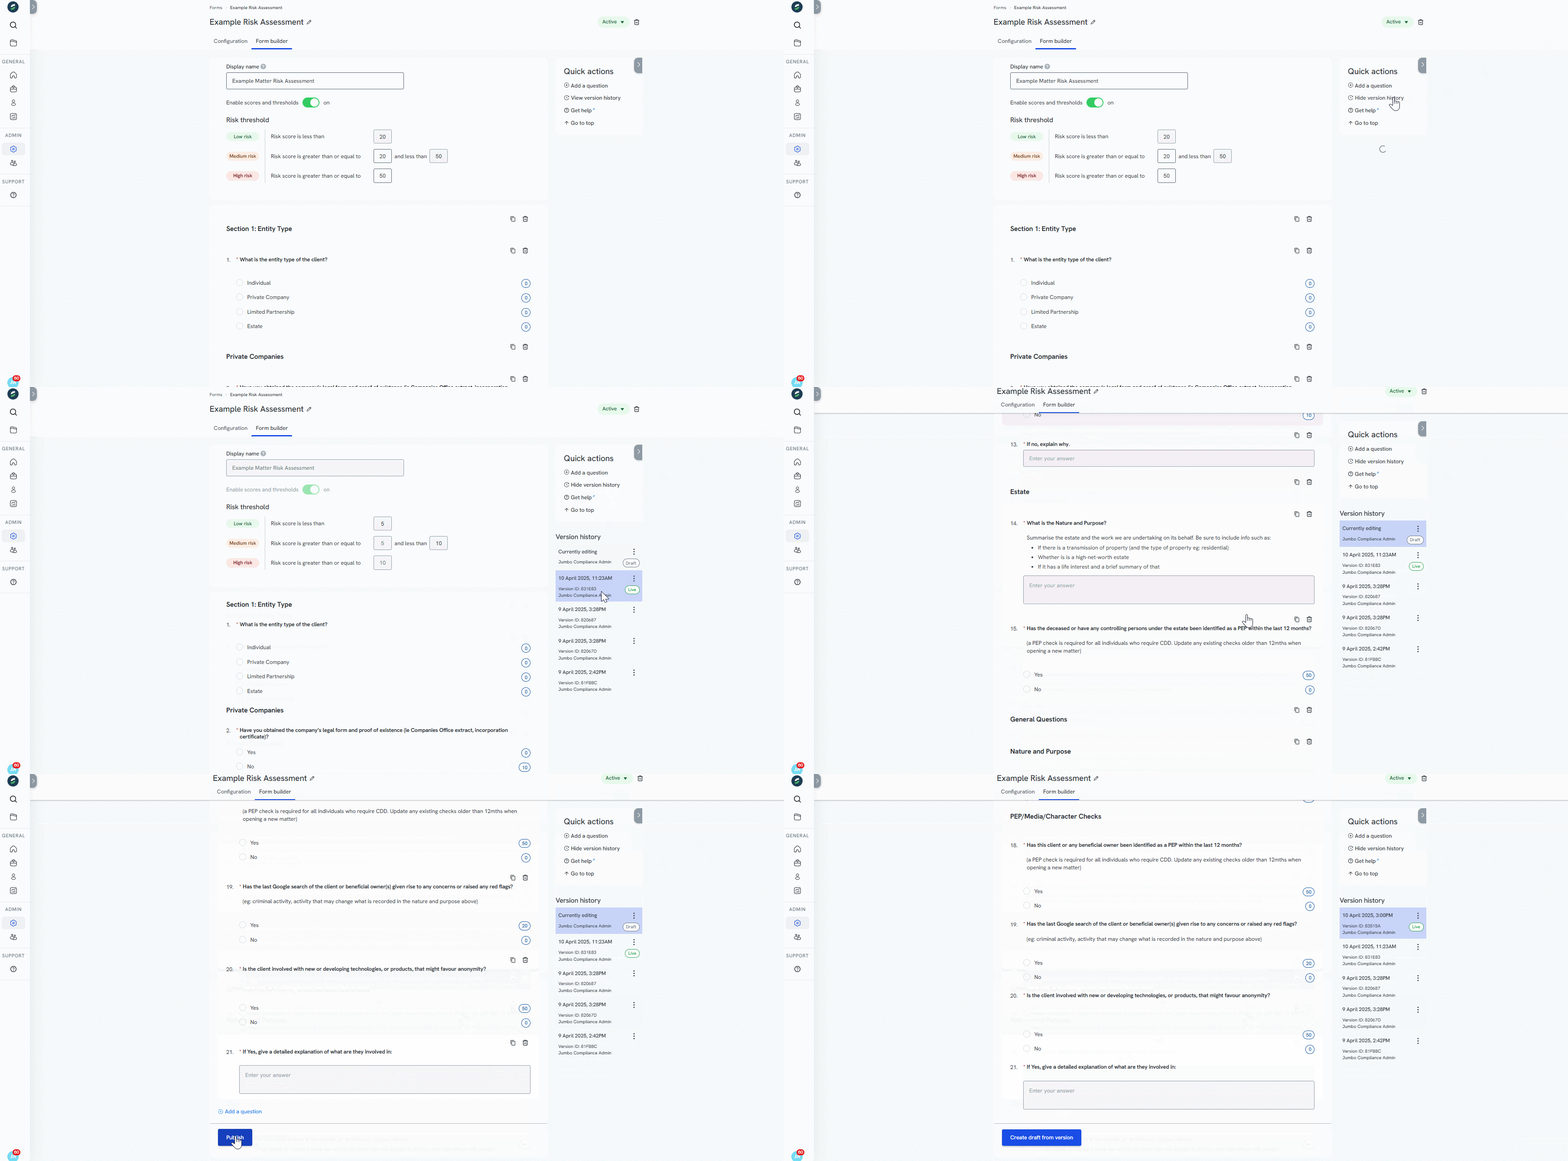
Version history
Every time you publish a new version of your risk assessment, it’s saved in version history. This provides full traceability, supports audits, and lets you track how your risk assessment evolves over time.
➤ Every time you publish a form, a new version is saved automatically.
➤ Click View version history to see a list of versions of your form.
➤ To publish an old version, click the old version from the list then click Publish
Duplicate form
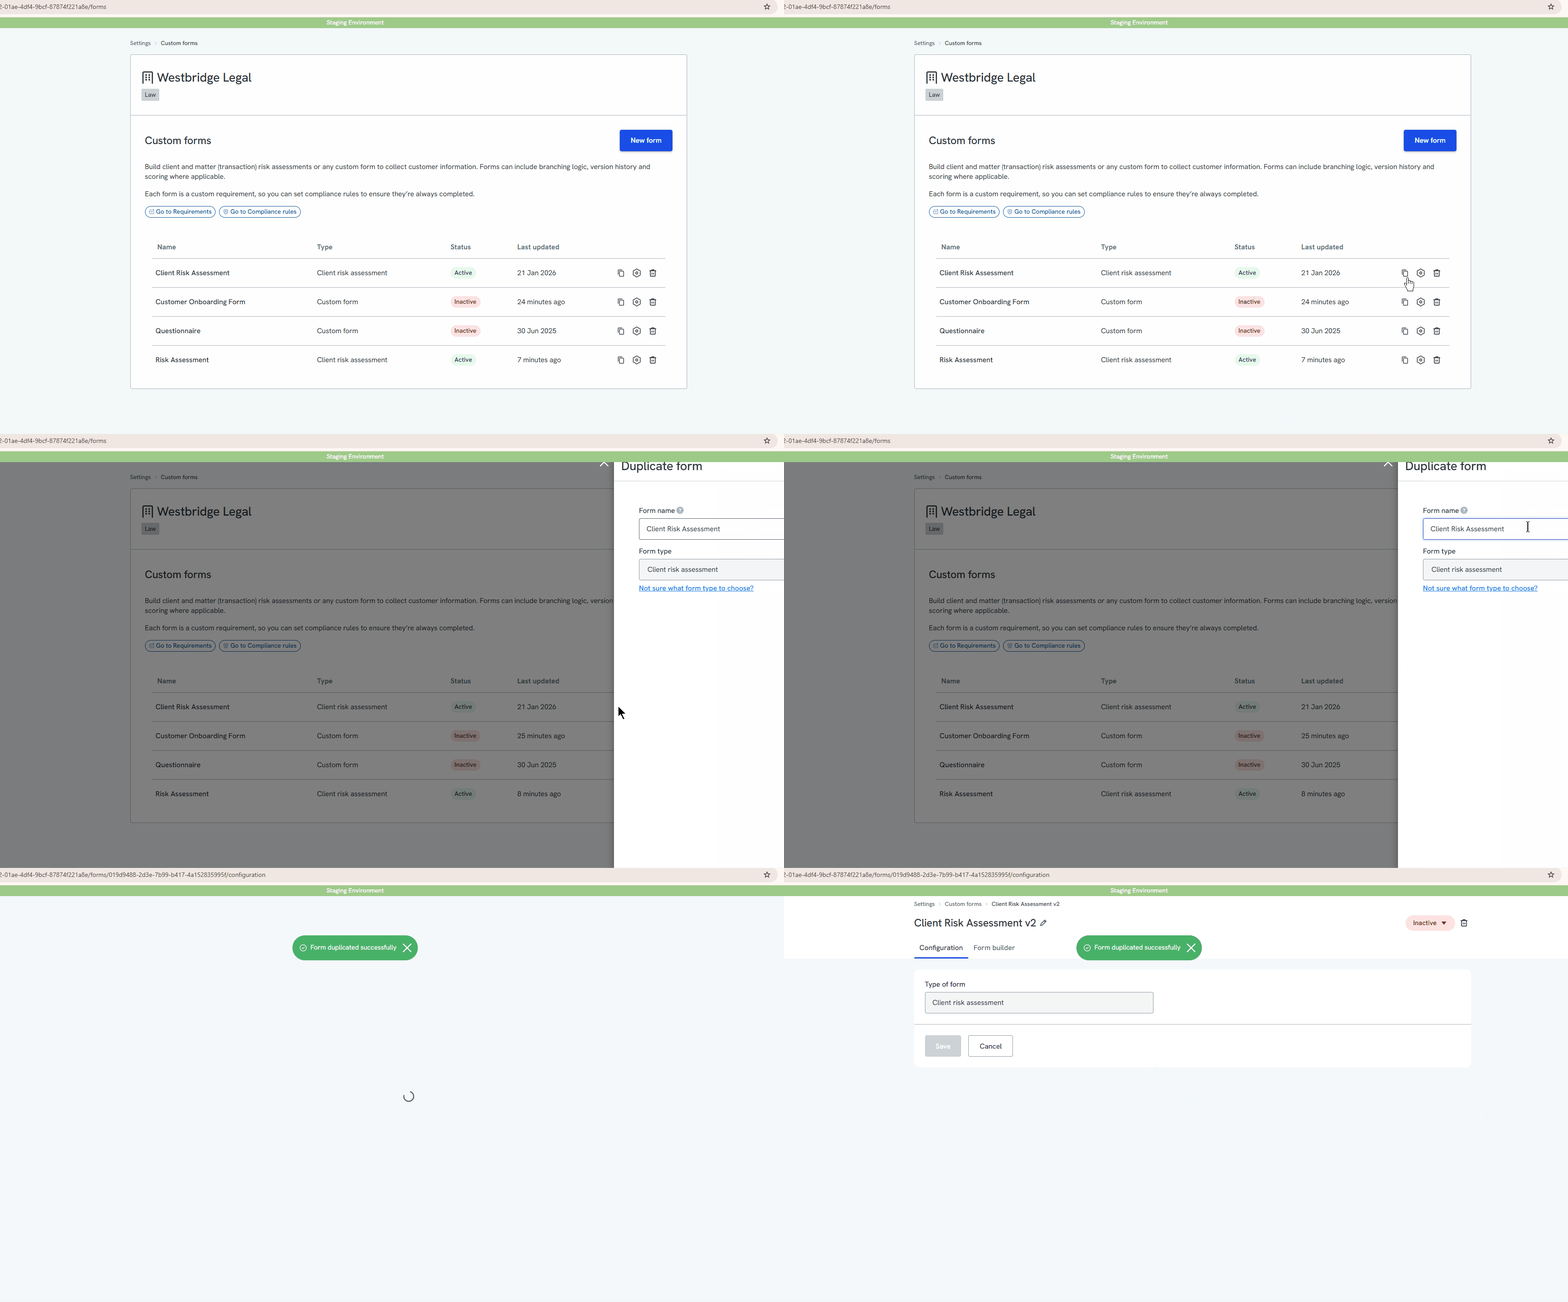
Save time when creating similar risk assessments by duplicating existing forms instead of building new ones from scratch.
➤ Within the forms library, click the duplicate icon and give the form a new name.
Note that when you clone a form the new form will be set to inactive.
Printing a risk assessment
You can print or save a copy of a completed risk assessment questionnaire directly from a case.
Option 1: Save as PDF using print case option
- Open the case and go to the completed risk assessment.
- Click on the three dots next to the "Ready for Review" option.
- Then, select Print case from the dropdown.
- You should be able to save this as a PDF!